

JFrog的Artifactory是一款Maven仓库服务端软件,可以用来在内网搭建maven仓库,供团队、公司内部公共库的上传和发布以及使用,以提高公共代码使用的便利性。
个人Library仓库使用:传送门
搭建环境
- JFrog提供免费并开源的Artifactory环境包,下载Artifactory,目前下载的是5.3.0版本,官网:https://www.jfrog.com
- 系统环境:Windows、Linux
- 安装Java环境,并且JDK版本1.8+
启动服务
两种启动方式:官网启动方式讲解
Manual Installation
解压下载文件,进入
artifactory-oss-5.3.0\bin\目录,Window环境双击artifactory.bat文件;Linux环境执行artifactory.sh文件
执行文件后,等待Artifactory开启,运行成功(注意不能关闭启动服务的控制台,否则服务也会被终止):

Service Installation
后台启动,不需要在服务运行期间打开控制台,即可以关闭服务的控制台。
- 安装服务
- Windows上执行
installService.bat脚本 - Linux上执行
./installService.sh,需要root权限
- Windows上执行
- 启动服务
- Windows上控制台执行命令
sc start Artifactory - Linux上执行命令
service artifactory start
- Windows上控制台执行命令
- 相关命令
1
2
3
4
5
6
7
8
9
10
Windows:
sc stop Artifactory // 停止服务
sc query Artifactory // 检查服务状态,检测服务是否运行或检测运行状态
uninstallService.bat // 卸载服务
Linux:
service artifactory check // 检查服务状态,检测服务是否运行或检测运行状态
service artifactory stop // 停止服务
tail -f $ARTIFACTORY_HOME/logs/artifactory.log // 查看Artifactory日志
./uninstallService.sh // 卸载服务
使用该方式启动服务后,账号密码已默认为admin和password;接下来的步骤与Manual Installation方式基本一致,只是不用设置账号密码。
服务初始化
Manual Installation的启动方式不要关闭控制窗口,关闭后本地仓库也会关闭;Service Installation可以关闭控制窗口。打开本地仓库:http://localhost:8081/artifactory ,首次进入需要设置管理员密码,设置完成后,可跳过其他的设置,可以在后面再创建仓库。
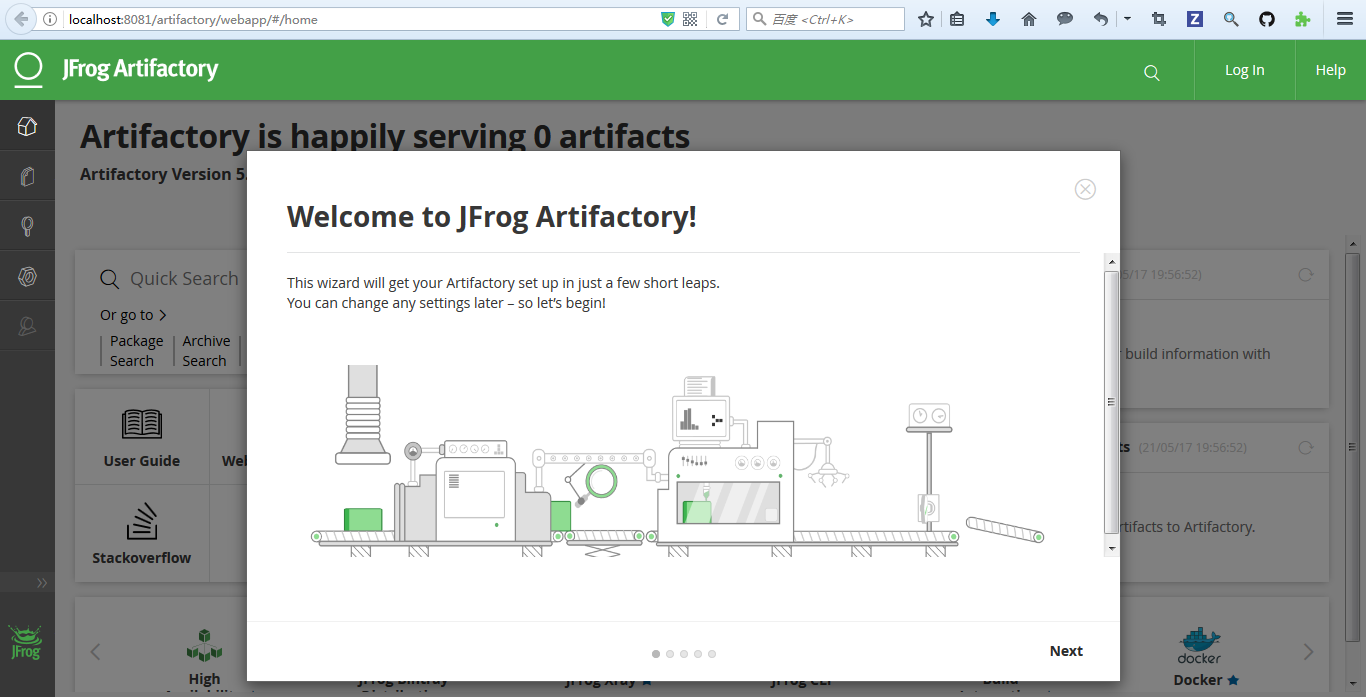
输入账号:admin,密码:password,登录

创建Library仓库,如果选择gradle,会生成下面4个Repository:

发布Library到本地仓库
打开AndroidStudio,新建Library类型的Module
配置项目build.gradle
1
2
3
4
5
6
7
8
9
10
11
12
13
14
15
16
17
18
buildscript {
repositories {
jcenter()
}
dependencies {
classpath 'com.android.tools.build:gradle:2.2.3'
// 添加
classpath "org.jfrog.buildinfo:build-info-extractor-gradle:4+"
// NOTE: Do not place your application dependencies here; they belong
// in the individual module build.gradle files
}
}
allprojects {
repositories {
jcenter()
}
}配置LibraryModule的build.gradle
1
2
3
4
5
6
7
8
9
10
11
12
13
14
15
16
17
18
19
20
21
22
23
24
25
26
27
28
29
30
31
32
33
34
35
36
37
38
39
40
41
42
43
44
45
46
47
48
49
50
51
52
53
54
55
56
57
58
59
60
61
62
63
64
65
66
67
68
69
70
71
72
73
74
75
76
77
78
79
80
81
82
83
84
85
86
87
88
89
90
91
92
93
94
95
96
97
98
99
100
101
102
103
104
105
106
107
108
109
110
111
112
113
114
115
116
117
118
119
120
121
122
123
124
125
126
127
128
129
130
131
132
133
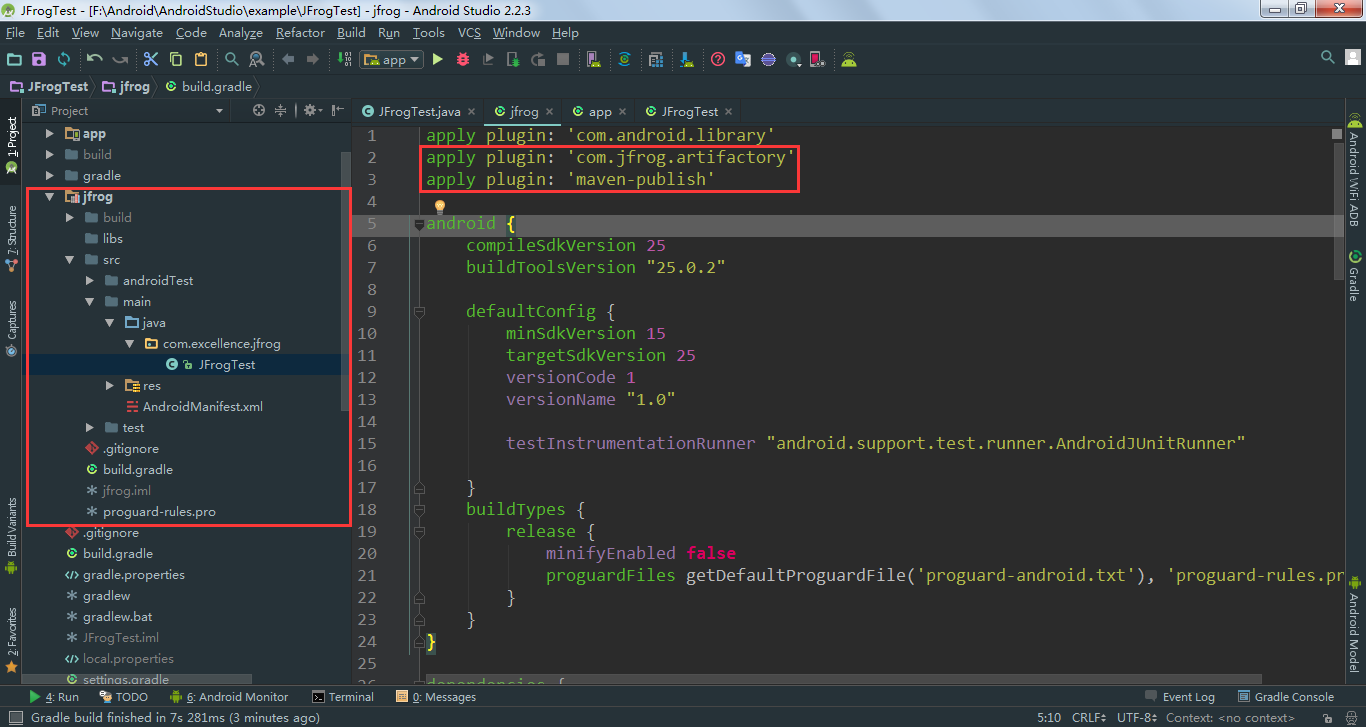
134apply plugin: 'com.android.library'
/*** apply plugin ***/
// 添加
apply plugin: 'com.jfrog.artifactory'
// 添加
apply plugin: 'maven-publish'
android {
compileSdkVersion 25
buildToolsVersion "25.0.2"
defaultConfig {
minSdkVersion 15
targetSdkVersion 25
versionCode 1
versionName "1.0"
testInstrumentationRunner "android.support.test.runner.AndroidJUnitRunner"
}
buildTypes {
release {
minifyEnabled false
proguardFiles getDefaultProguardFile('proguard-android.txt'), 'proguard-rules.pro'
}
}
}
dependencies {
compile fileTree(dir: 'libs', include: ['*.jar'])
androidTestCompile('com.android.support.test.espresso:espresso-core:2.2.2', {
exclude group: 'com.android.support', module: 'support-annotations'
})
compile 'com.android.support:appcompat-v7:25.3.1'
testCompile 'junit:junit:4.12'
}
// 生成源码任务
task sourcesJar(type: Jar) {
from android.sourceSets.main.java.srcDirs
classifier = 'sources'
}
// 生成Javadoc任务
task javadoc(type: Javadoc) {
source = android.sourceSets.main.java.srcDirs
classpath += project.files(android.getBootClasspath().join(File.pathSeparator))
}
task javadocJar(type: Jar, dependsOn: javadoc) {
classifier = 'javadoc'
from javadoc.destinationDir
}
javadoc {
options{
encoding "UTF-8"
charSet 'UTF-8'
author true
version true
links "http://docs.oracle.com/javase/7/docs/api"
}
}
/*** 上传源码 ***/
artifacts {
archives javadocJar
archives sourcesJar
}
/*** 添加 ***/
// 本地仓库地址
def MAVEN_LOCAL_PATH = 'http://localhost:8081/artifactory'
// 项目名称[可修改]
def ARTIFACT_ID = 'jfrog'
// 发布的版本[可修改]
def VERSION_NAME = '1.0.0'
// jcenter上的路径[可修改]
def GROUP_ID = 'com.excellence'
/*** setting pom ***/
publishing {
publications {
aar(MavenPublication) {
groupId GROUP_ID
version = VERSION_NAME
artifactId ARTIFACT_ID
// Tell maven to prepare the generated "*.aar" and source file for publishing
artifact("$buildDir/outputs/aar/${project.getName()}-release.aar")
artifact javadocJar
artifact sourcesJar
pom.withXml {
def dependencies = asNode().appendNode('dependencies')
configurations.compile.allDependencies.each {
// 如果有compile fileTree(),group会为空,需要去除
if (it.group != null) {
def dependency = dependencies.appendNode('dependency')
dependency.appendNode('groupId', it.group)
dependency.appendNode('artifactId', it.name)
dependency.appendNode('version', it.version)
}
}
}
}
}
}
/*** setting artifactorypublish ***/
artifactory {
contextUrl = MAVEN_LOCAL_PATH
publish {
repository {
/**
* repoKey:指定发布到的仓库名称[可修改]
*/
// The Artifactory repository key to publish to
repoKey = 'gradle-release-local'
// 发布者用户名[可修改]
username = "admin"
// 发布者密码[可修改]
password = "password"
}
defaults {
// 这里的'aar'对应publishing任务中的'aar',任务名称可自定义
// Tell the Artifactory Plugin which artifacts should be published to Artifactory.
publications('aar')
publishArtifacts = true
// Properties to be attached to the published artifacts.
properties = ['qa.level': 'basic', 'dev.team': 'core']
// Publish generated POM files to Artifactory (true by default)
publishPom = true
}
}
}这里仅仅是简单的配置使用,当然你也可以查些高级的使用,比如在 gradle.properties中进行配置的安全性做法,这里就不深入了。
1
2
3artifactory_user=${security.getCurrentUsername()}
artifactory_password=${security.getEncryptedPassword()!"insert password"}
artifactory_contextUrl=http://localhost:8081/artifactory说明
- 在这里上传的事 release.aar 包,故执行命令的时候需要执行release打包
- artifactory/publish/repository/repokey 是你要上传的respository名称,当然可以新建,这里我们建立的是gradle仓库,上传的仓库是gradle-release-local
三种方式上传
操作上传
点击打开Gradle projects,进入Module的Tasks中,顺序执行下面步骤1
2
3build目录->双击assembleRelease : 打release 包
publishing目录->双击generatePomFileForAarPublication : 生成 pom.xml 文件
publishing目录->双击artifactoryPublish :上传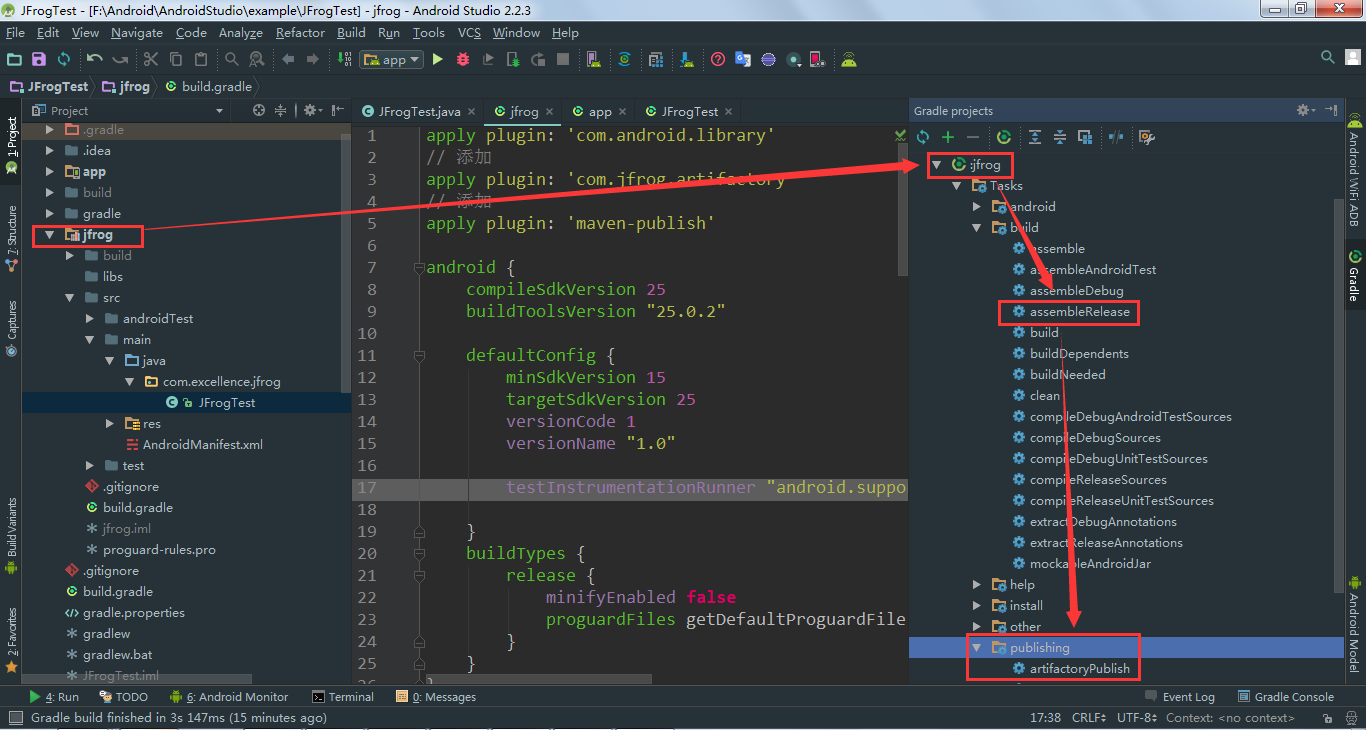
命令上传
从Terminal控制台进入到Module中,执行命令1
gradle assembleRelease generatePomFileForAarPublication artifactoryPublish

保密命令上传,即同命令上传一致,但是不泄露用户和密码
修改依赖项目中的build.gradle文件,使用参数替代username和password,此时编译不通过,因为参数是通过命令传入的,如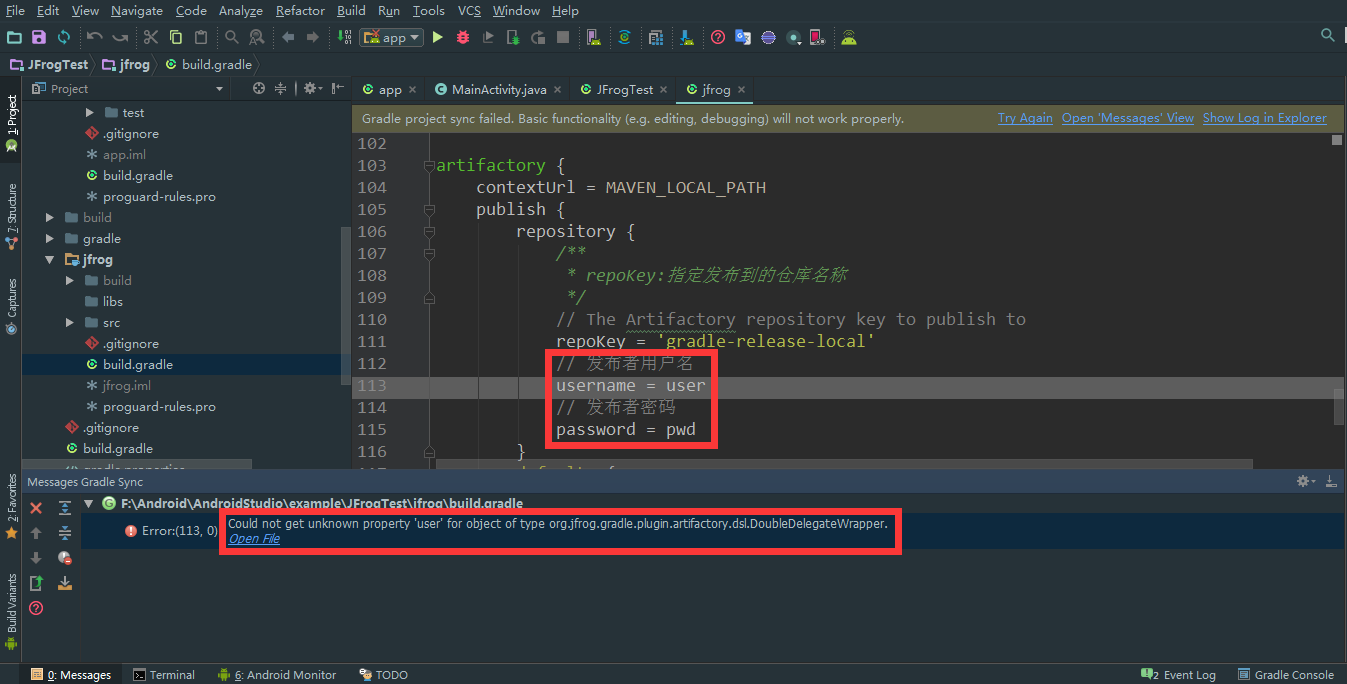
然后执行命令1
gradle -Puser=用户名 -Ppwd=密码 assembleRelease generatePomFileForAarPublication artifactoryPublish
版本更新
修改LibraryModule中的VERSION_NAME,然后重新上传即可
项目引用Library
配置项目build.gradle
1
2
3
4
5
6
7allprojects {
repositories {
jcenter()
// 添加仓库地址
maven { url "http://localhost:8081/artifactory/gradle-release-local/" }
}
}配置工程Module的build.gradle
1
compile 'com.excellence:jfrog:1.0.0'
基本组成:
1
group_id:artifact_Id:version_name
- group_id : com.excellence
- artifact_id : jfrog
- version_name: 1.0.0